


Install guide 2024
Streamlining your IT efficiency
Quick Start
Installing the Pioneerdesk application and registering devices.
Step 1: Pioneerdesk installation requirements
Check your network for compatibility with Pioneerdesk and configure the proxy or firewall to work with Pioneerdesk and the devices.
Step 2: Download the Pioneerdesk Windows application
The Pioneerdesk Windows application is required for both manual and automated installation.
Download & installation instructions
The Pioneerdesk application is required for both manual and automatic installation. For manual installation, download the software to the local computer. For automatic registration, download the software to a location that is accessible to all computers in the network.
Automatic installation on Windows devices with Microsoft MECM (MSIX installer)
The information in this article requires advanced experience for IT professionals.
This guide will walk you through the complete configuration for creating an application in MECM. These instructions are intended for use with Microsoft Endpoint Configuration Manager (MECM) 2107, but will also apply to newer versions of MECM.
Downloading the PioneerDesk Application
Download via the Pioneerdesk website:
a) Navigate to https://www.pioneerdesk.one
b) Select the button „Start your free trial“
c) Fill out the form.
d) Click on "here" and the download with everything neccessary starts
e) Install the msi file: „PioneerDesk_2.0.2.0.msi“
Creating an Application in MECM
a) Save the MSI file in your application repository as usual
b) The recommended structure is Manufacturer -> Product Name -> Version
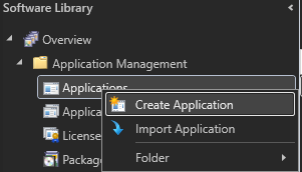
c) In the MECM Console, navigate to „\Software Library\Overview\Application Management\Applications“
d) Right-click on Applications to create a new application:
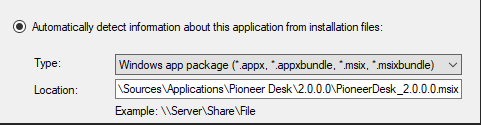
In the first dialog for creating the application, select „Windows app package“ as the „Type“ for handling MSI files. Navigate to the UNC path of your Pioneerdesk application and select the MSI file there:
Confirm the import by clicking „Next.“ In the following information window, the details of the application will be displayed.
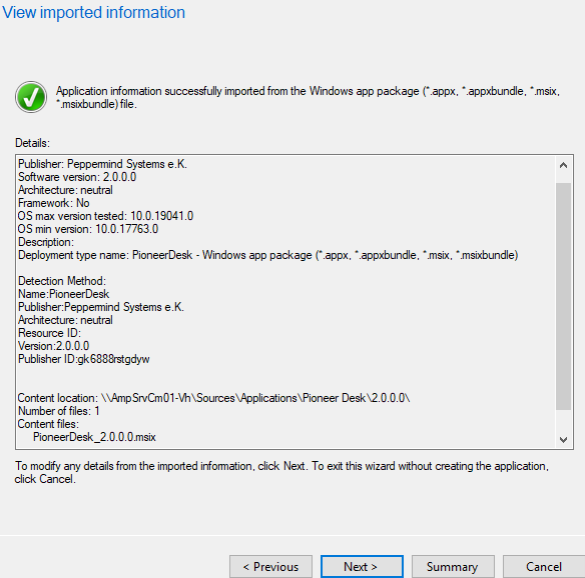
Confirm the import by clicking „Next.“ In the following information window, the details of the application will be displayed.
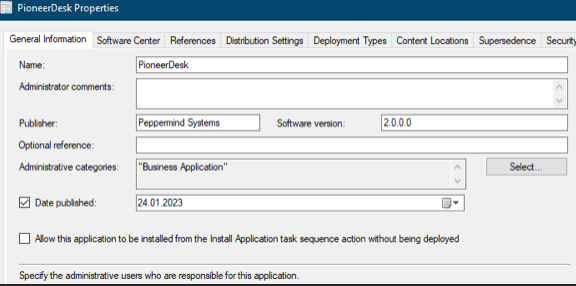
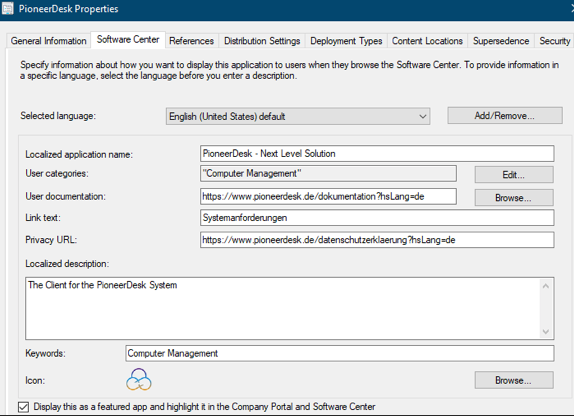
Application basic information
Name: PioneerDesk – Next Level Solution
Administrative Comments: The Client for the PioneerDesk System
Publisher: Peppermind Systems
Software Version: 2.0.2.0
Optional Reference:
Administrative Categories: Computer Management
Date Published: Date of Creation
Navigate to "Assets and Compliance > Overview > Device Collections"
Create a deployment group, define it with a meaningful name, and include the objects that should receive the application. It is advisable to use a dynamic query, for example, "All devices with Windows OS v.7 / 10 / 11"
For more information, visit: Create a Dynamic Collection - Configuration Manager | Microsoft Learn
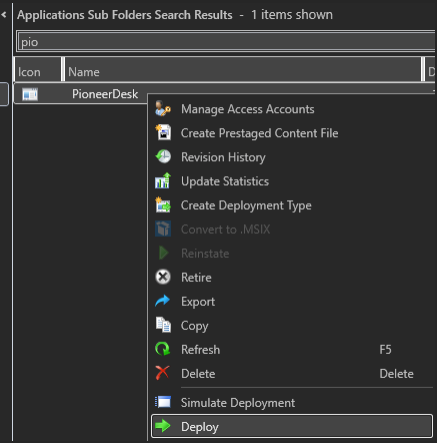
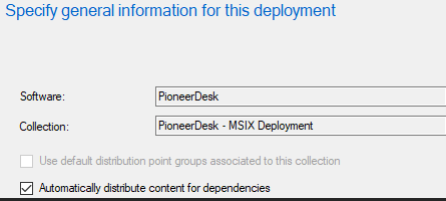
In the last step, you distribute the application to the device collection:
During the synchronization cycle between the Client Agent and MECM, the application will appear in the Software Center and, depending on the deployment method, will be deployed or installed automatically:
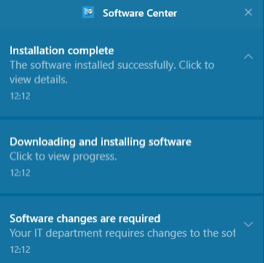
The application is then installed on the end device and contacts the Pioneerdesk servers to start logging (& troubleshooting, if set to).